This app facilitates the irrigation system for your plants/crops, with the use of Drip Irrigation methodology. With this app, a user can create and maintain schedules for irrigating their produce, supported by feedback events using highly sophisticated sensors. User can also track the condition of the soil, thus can alter the schedules to facilitate the maximum yield of his produce.
Aim
A revolutionizing app made to ease your worry about watering the plants/crops and to reduce wastage of water, thus creating a healthy environment for tomorrow’s generation.
Intended Users
Farmers, gardeners, horticulturists, nurserymen, and plantsmen.
A device is a hardware unit of SmartGro which couples with SmartGro Android/iOS app to serve the purpose of this technology. The device has 2 primary components viz., valves and sensors..
Valve:
A valve is a primary hardware component of SmartGro which connected via a controller to device irrigates the plants with drip irrigation methodology.
Sensor:
A sensor is a hardware component used to track the soil and climatic conditions, thus providing a knowledgeable perspective of the current external factors in the environment affecting your produce.
Zone:
A conceptual region which has been allocated a specific number of valves and sensors (optional).
Schedule:
A routine program/plan, made by user, which turns on/off the valves.
There could be two types of schedule:
Single Schedule: A schedule made for the purpose of single time execution.
Recurring Schedule: A schedule which will execute after every particular interval of time.
Feedback Event:
An event is a program that will trigger on the basis of values fetched from sensors. A live sync of sensor values, when compared to the user specified condition, if matches will trigger the action of turning on/off of the valve, to compensate the loss caused or the environmental factors which triggered the event.
Log:
With Sync Logs and/or Sync Sensor Logs feature of SmartGro mobile app, a user could get all the respective status of the valve which were turned on/off by schedules or events, and the change in the value of sensors throughout a day. App has a feature of showing graph for any user selected date for the sensor values logs synced earlier.
Device Installation
SmartGro BT
Built in smart IoT technologies comprise of sensors, controllers and watering kits bringing an efficient system of irrigation that helps implementing drip irrigation in Landscaping and Precision Farming.
SmartGro BT Components
Controller Unit
Caption
Valve Box
Caption
Motor Pump
Caption
Sensor Box
Caption
SmartGro BT Installation
Step 1
Connect Motor pump to the Valve controller unit
Caption
Step 2
Connect Valve controller unit to Controller unit
Caption
Step 3
Connect the Motor pump to Water tank and place the outlet to the soil
Caption
Step 4
Connect Sensor to Sensor Controller unit
Caption
Step 5
Connect Sensor controller unit to Controller unit
Caption
Step 6
Place the sensor into the soil
Caption
Step 7
Plug it up the Controller unit to AC Supply
Caption
Procedure
This app facilitates the irrigation system for your plants/crops, with the use of Drip Irrigation methodology. With this app, a user can create and maintain schedules for irrigating their produce, supported by feedback events using highly sophisticated sensors. User can also track the condition of the soil, thus can alter the schedules to facilitate the maximum yield of his produce.
Use case
Say a user John owns a farm with two different crops viz. potatoes and tomatoes, and he uses SmartGro Smart Irrigation System in his field for irrigation, which has four valves and two sensors. And In order to create a schedule, John must first create two zones say Potato zone and Tomato zone, each for potato and tomato respectively. While creating zones, John can assign two valves and one sensor each to the zones. Since potato needs less water compared to tomato, John can create schedules which waters the plant every morning for potato at 8 AM for a duration of 30 minutes, and two schedules for tomato, one at 8 AM for a duration of 30 minutes and another at 6 PM for a duration of 15 minutes. John also must handle a situation of not enough humidity in soil because of water evaporation from the soil by the heat from the sun, thus he must create 2 events for each zone, which will work upon the conditions as specified:
For potato, if the soil is less than 20% wet, the valves must be turned on for 15 minutes. For tomato, if the soil is less than 30% wet, the valves must be turned on for 20 minutes. He can also monitor the current level of wetness of soil by checking the current value of the sensor, and if needed, he can turn on the valves in a zone manually via the app.
Register a Device:
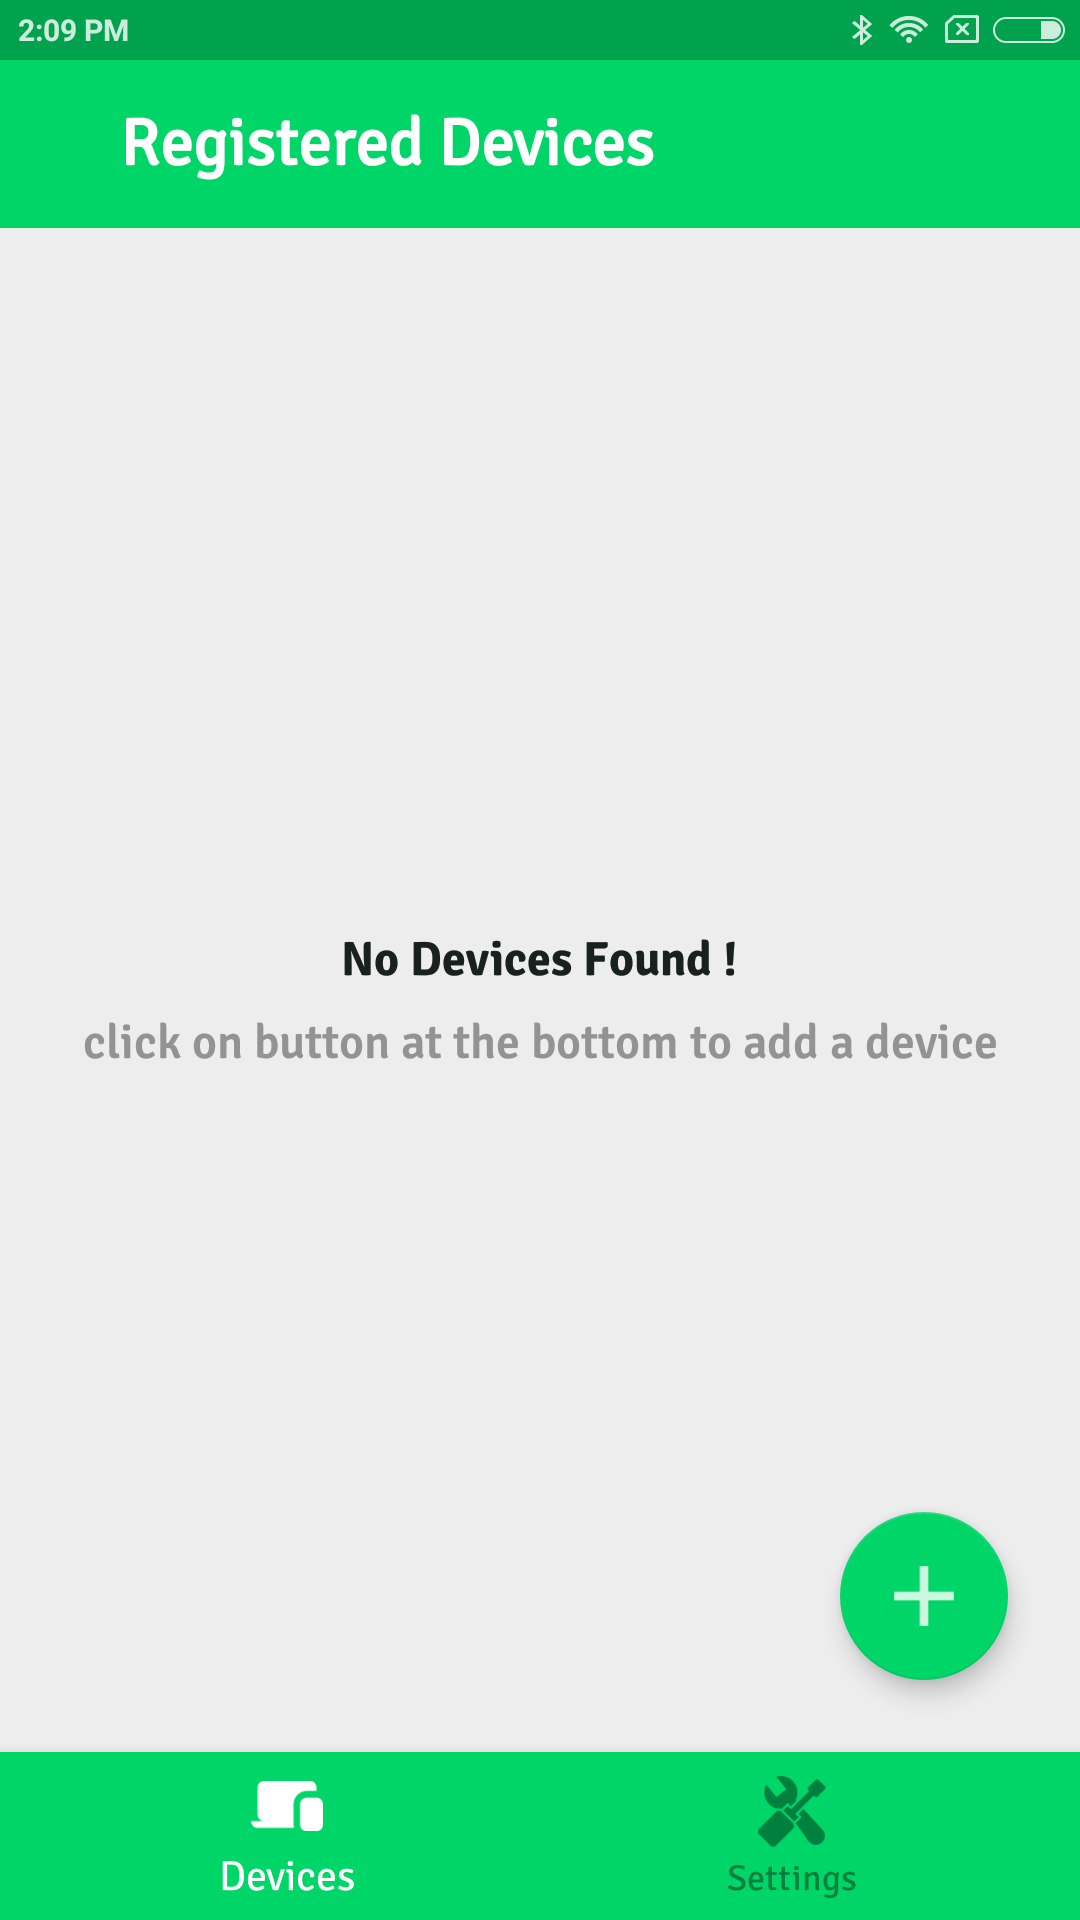
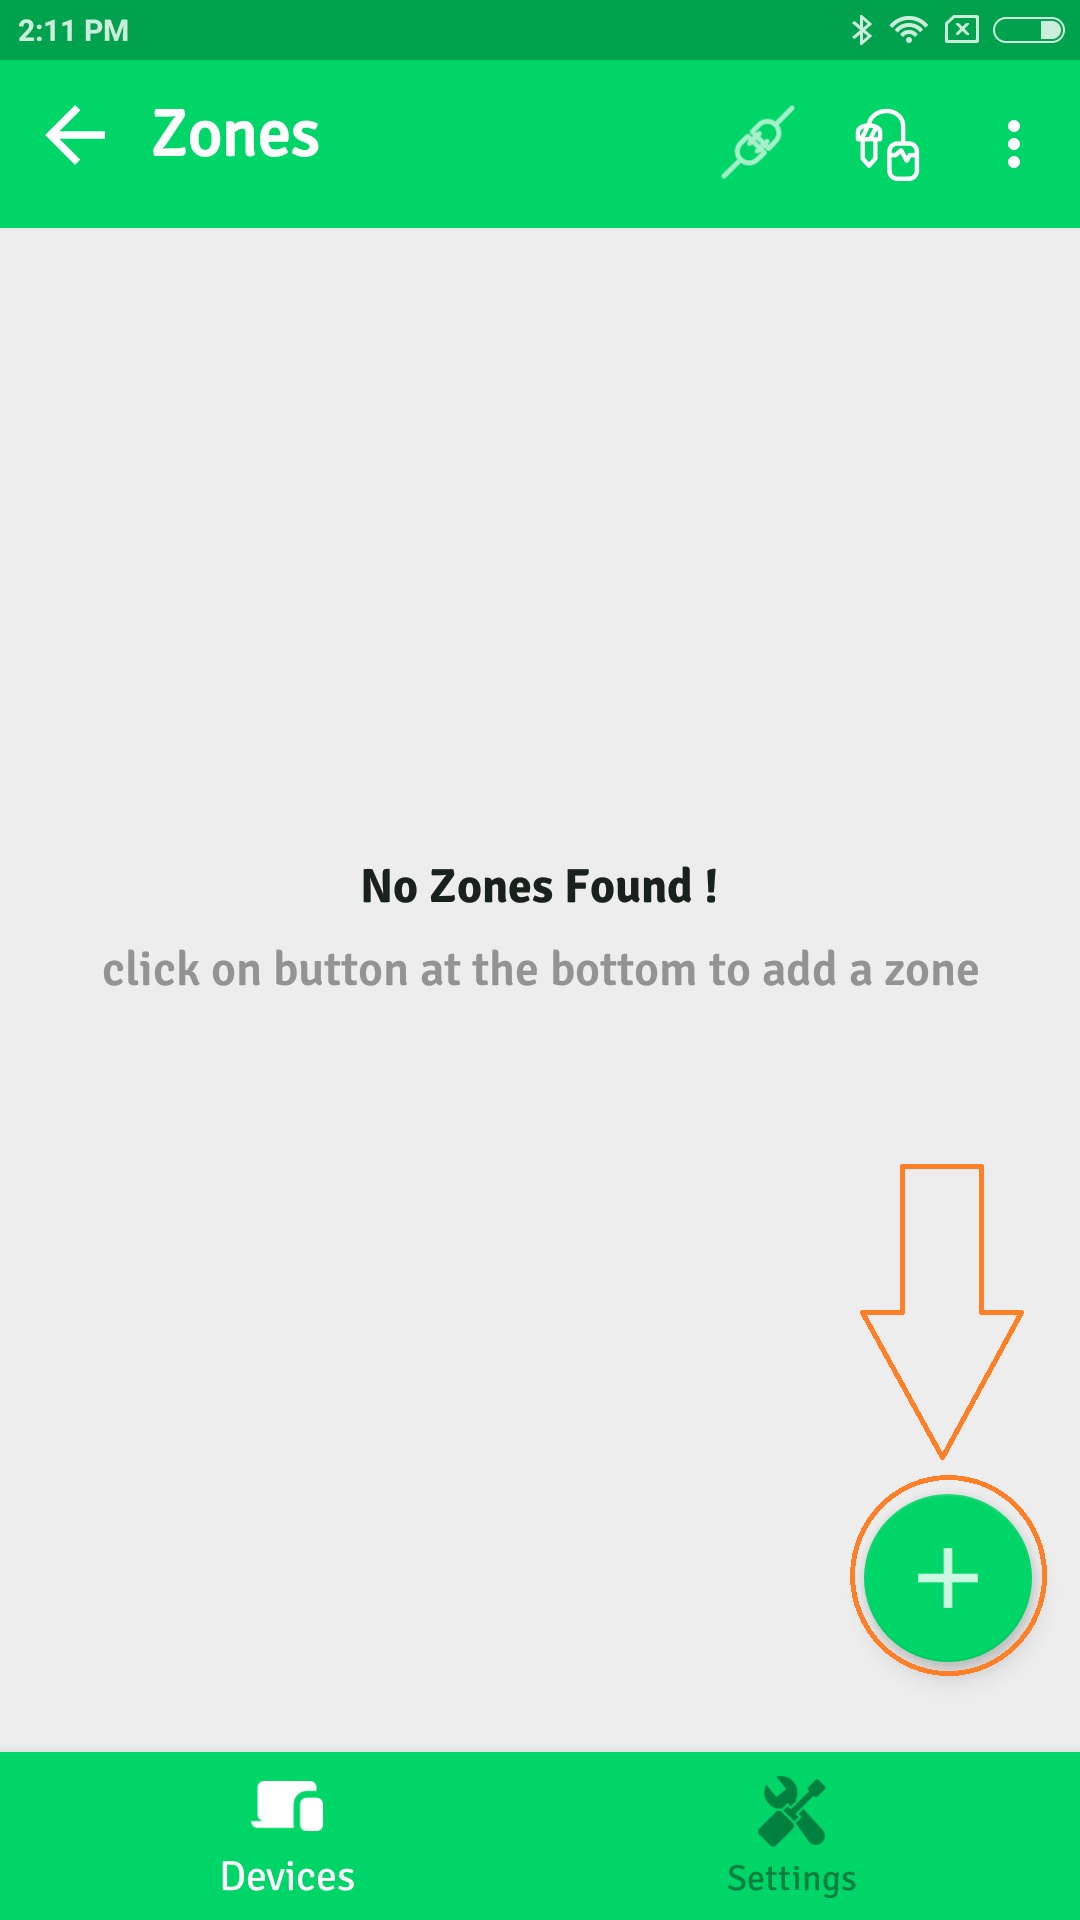
As soon as John opens the app, App welcomes him with a splash screen, followed by the screen for a List of all the SmartGro devices he owns. Initially, the screen would be blank, having only a bouncing “Plus” button, clicking upon which, lets the John register a SmartGro hardware device into the app.
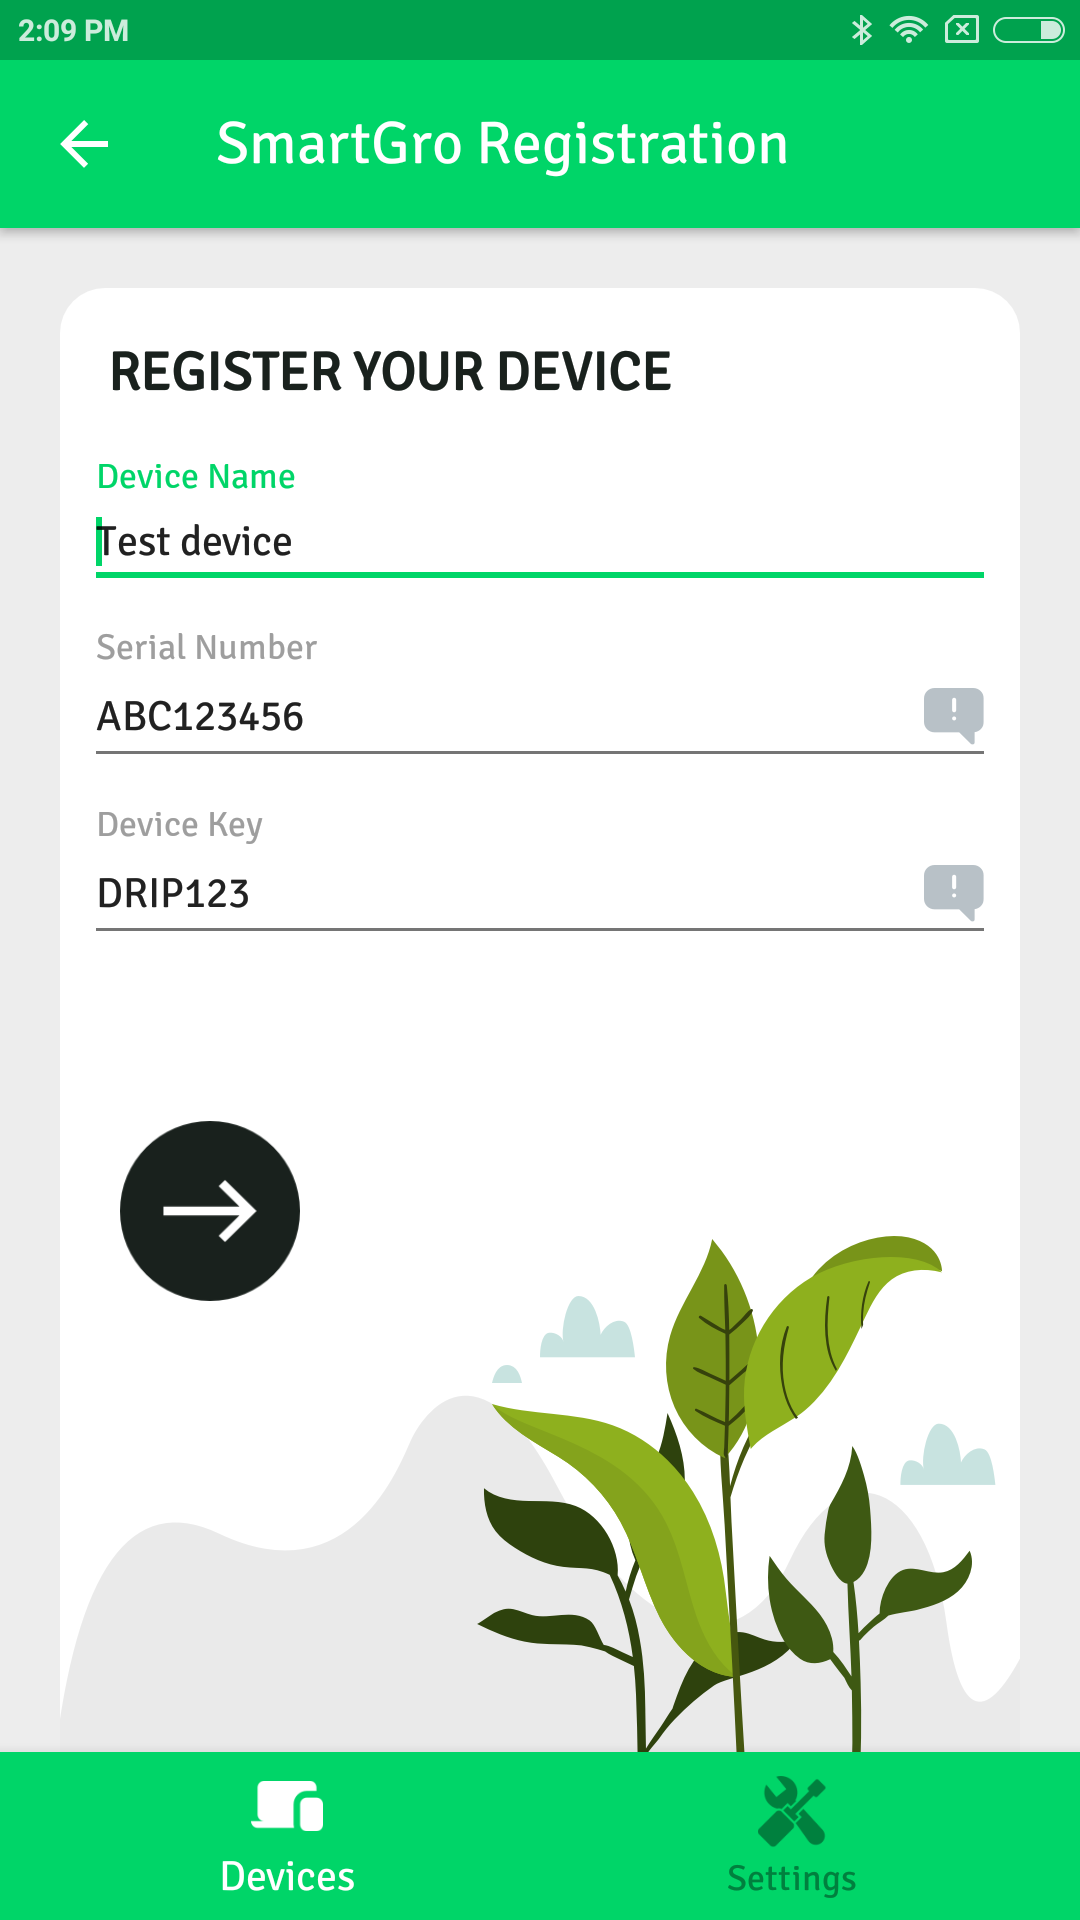
For this purpose, John has to provide a Device Name (with which he wishes to represent it), Device Serial Number (provided on the back of the carton package of SmartGro hardware unit), and a Device Key which John can acquire from product pack, or by contacting us directly via our email address
sales@troncart.com
CaptionCaption
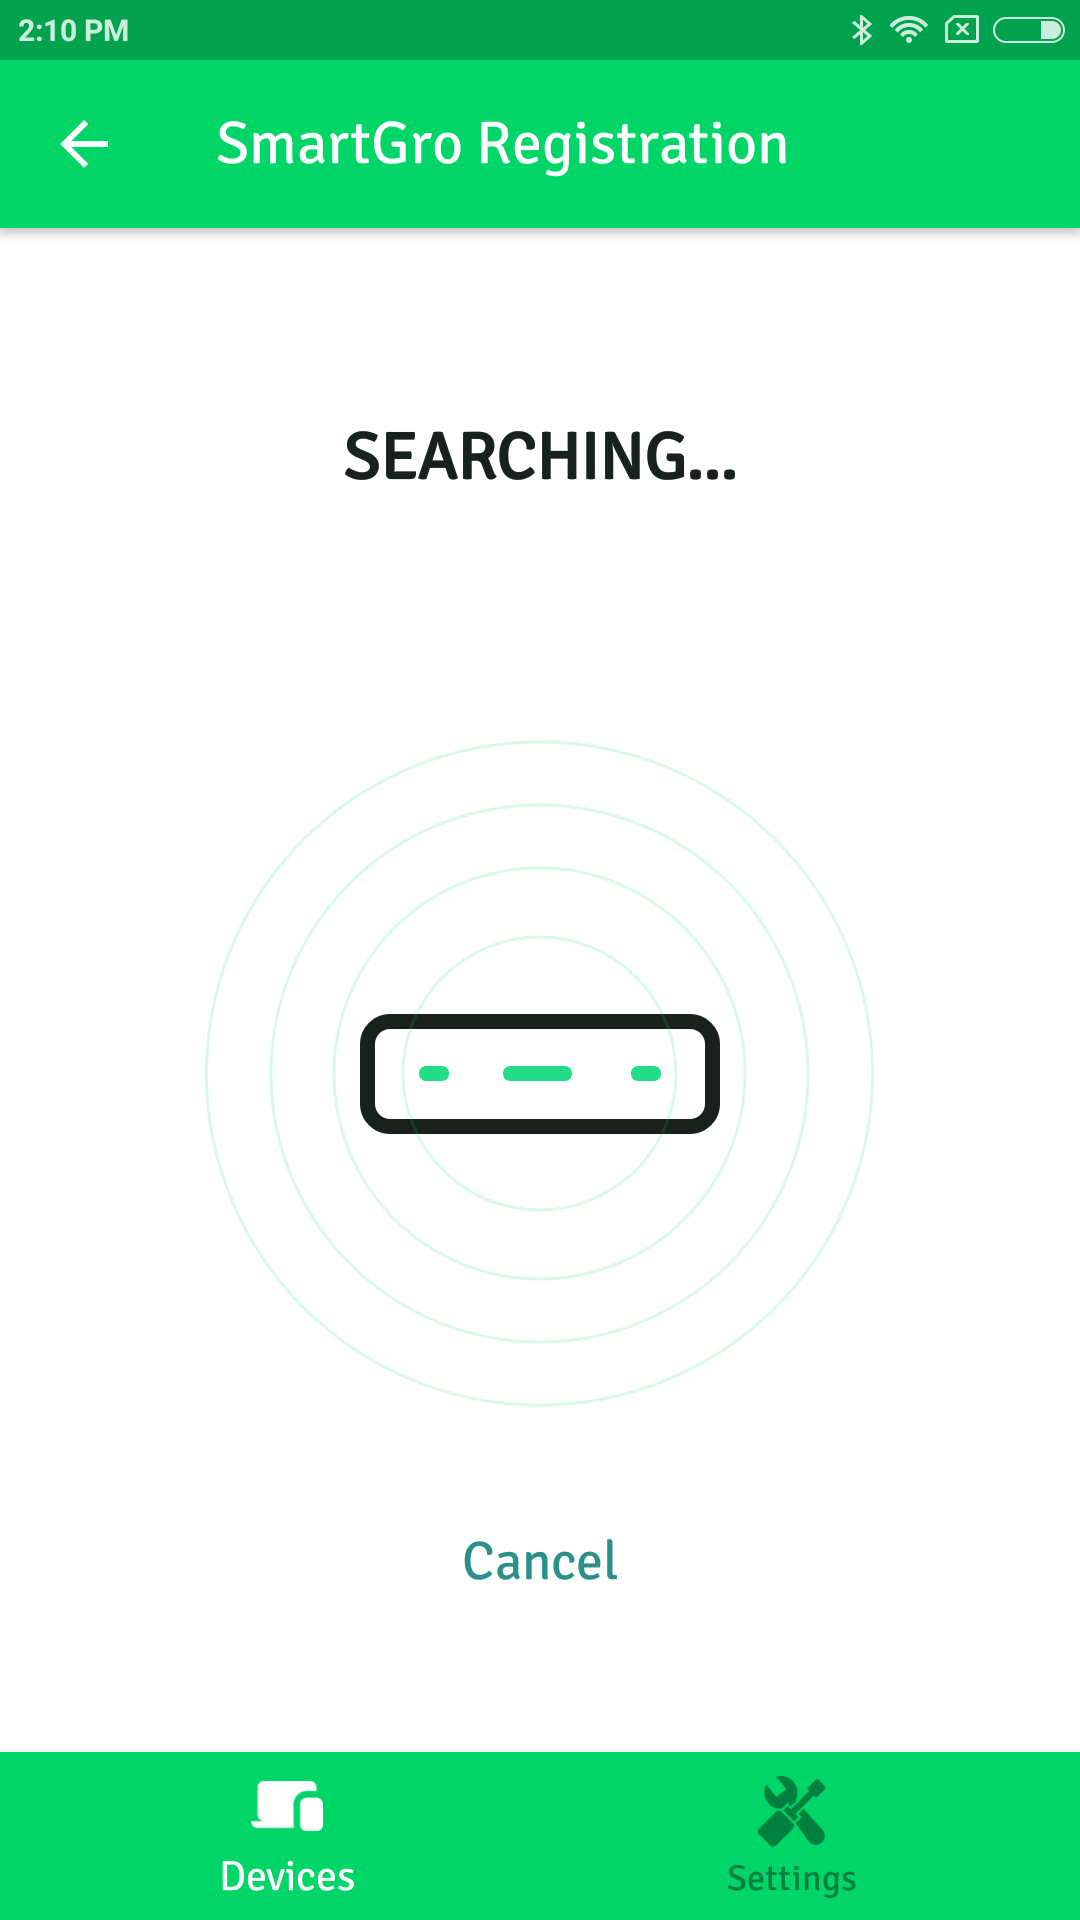
Following which, John has to click on the next arrow button at the bottom of the screen, which will initiate the bluetooth search for the SmartGro hardware unit, and shows a list of all the available SmartGro hardware bluetooth low energy devices nearby him. Now, John has to select the desired SmartGro hardware unit, and press on the continue button.
CaptionCaption
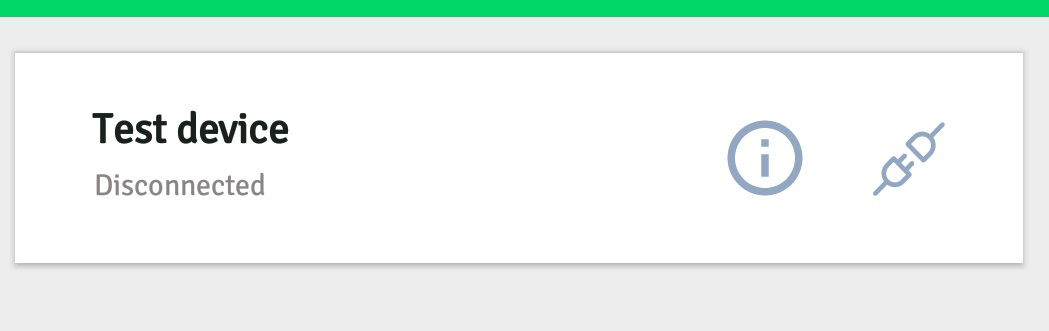
After which the app will initiate the attempt to connect to the SmartGro hardware unit via BLE. After establishing a successful BLE connection, the app registers the device and fetches the device info such as the number of valves and sensors in the SmartGro hardware unit. And on successful completion of registration, the app will redirect to the previous screen of a list of registered devices. Here John can see the newly registered device.
Caption
Now John is ready to create schedules and events as per his requirements.
Note
Searching the nearby bluetooth devices, establish a connection and to communicate with the SmartGro hardware unit via BLE, Android app needs the permission of Location and accessibility to the android device’s bluetooth. Also, since the bluetooth must be kept on, app will attempt to turn on the bluetooth of the android device.
Create a Sensor:
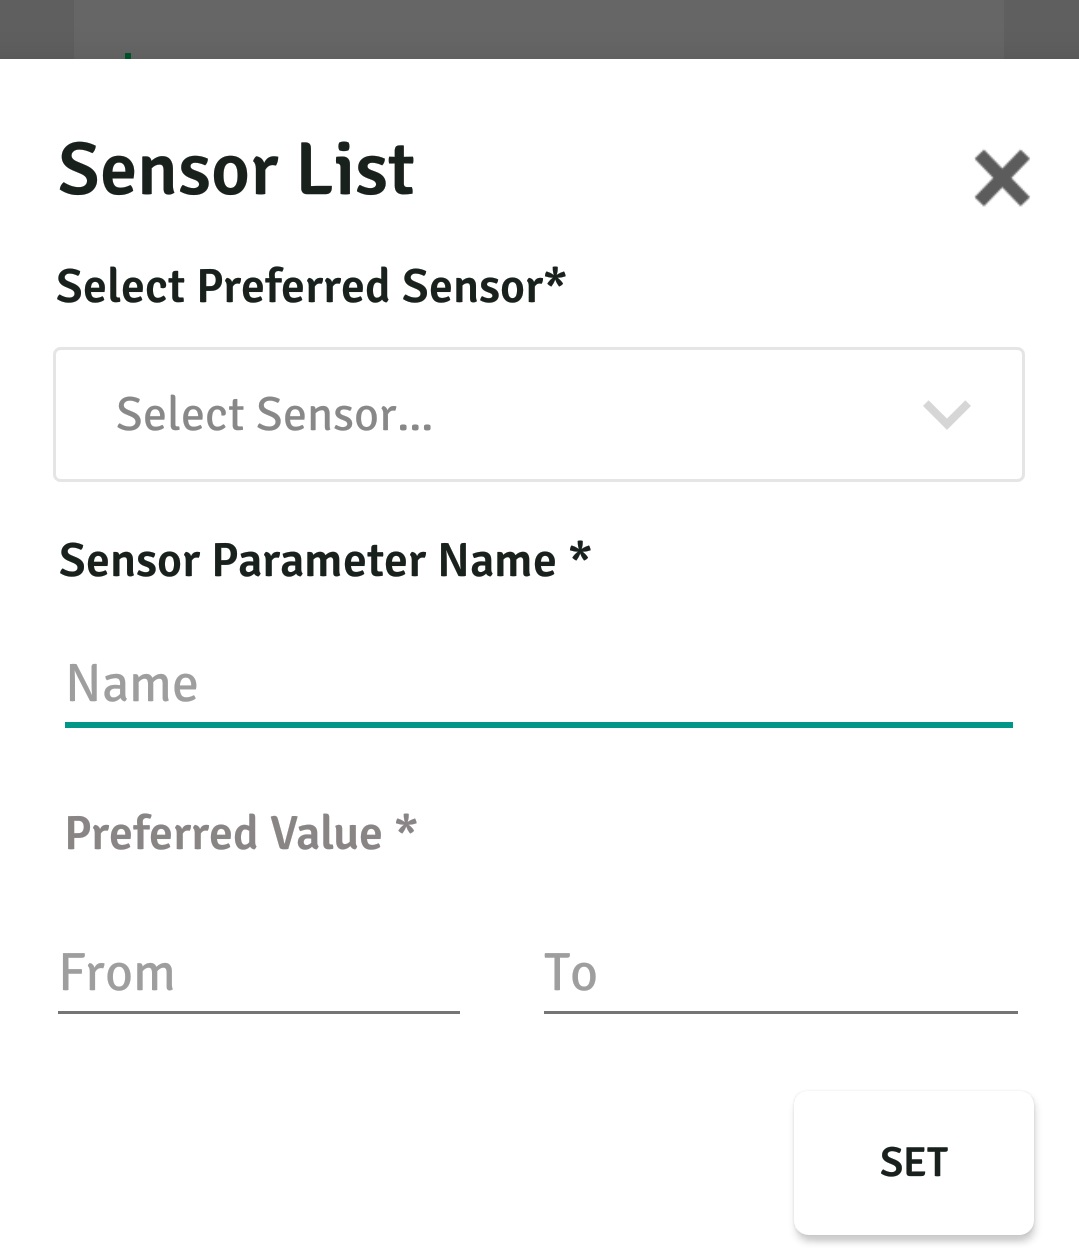
As defined in the use case, the current SmartGro hardware unit which John owns has 2 sensors. In order to Sync Sensor logs, retrieve the current value of any sensor, plot graph for the sensor values from log for any user-specified date and to create Feedback Events, John must register the sensor first, by going to create the zone section and thereby clicking upon the 'plus' button to create a sensor or by going to the sensor tabs from the top App bar “Sensor” menu and thereby clicking on the “Add” button on the bottom right of the screen.
CaptionCaption
Creating a sensor requires the following values:
Name, which John wishes to refer it with.
Sensor number, as John has 2 sensors, John has to select, which sensor in the farm he is referring to.
From value, a value which is a minimum acceptable percentage of the wetness of soil or the moisture in the soil.
To value, a value which is a maximum acceptable percentage of wetness of soil or the moisture in the soil.
After providing the bottom sheet dialog form with above-specified values, John has to click on the Save button on the bottom of the screen.
Note
Creating a Sensor is optional for creating a zone and is totally not needed for creating a schedule at all.
Create a Zone:
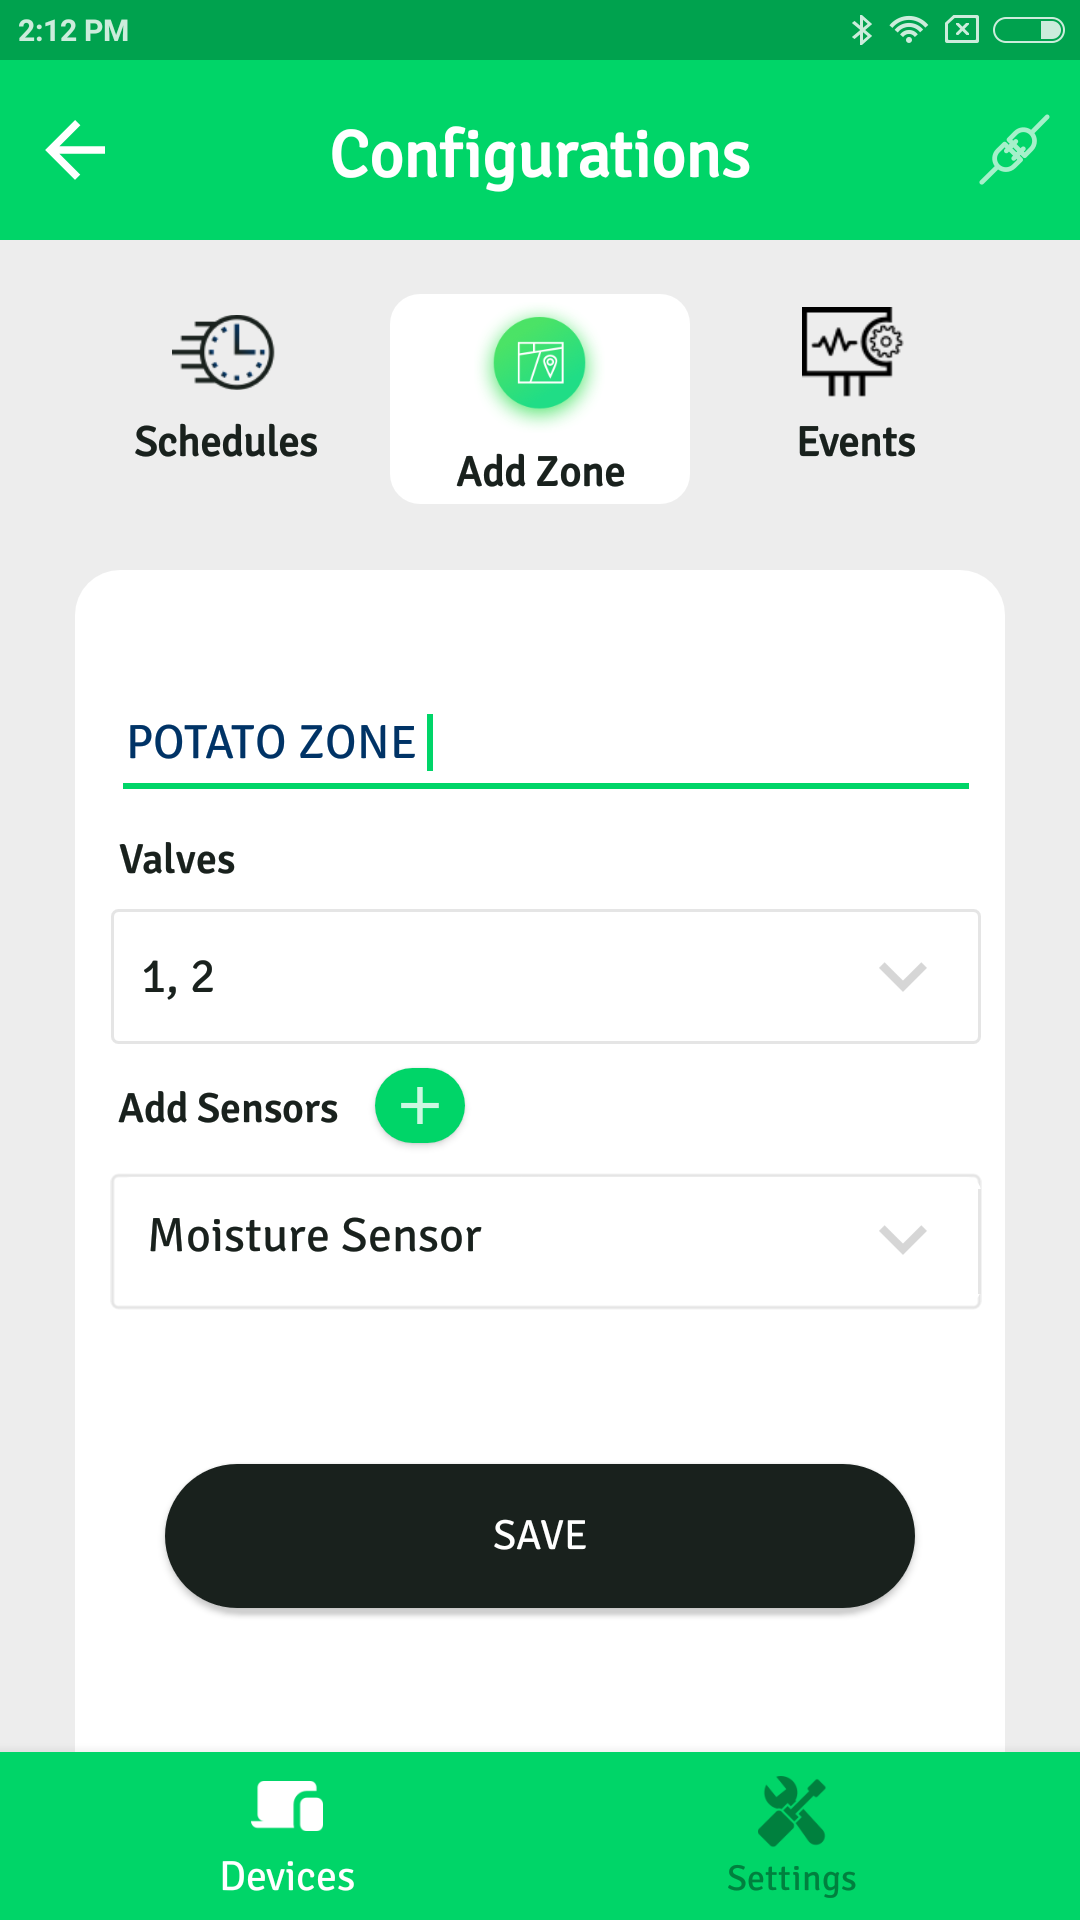
John now has to create two zones, each one for potato and tomato. Say, John's farm is divided into two equal parts, and he plants the seedlings of potatoes and tomatoes in each part equally. John plans to assign 2 valves to potato planted field and 2 for tomato. John, now using the app creates the zone. John, after opening up the app, he has to click on the registered device, upon which the app redirects to the screen showing details of a device while trying to connect with this device. Thereby clicking upon the 'plus' button in 'Zones' section. A new screen for creating Zone appears.
Caption
John has to provide the following details:
Zone name, for future reference, say 'Potato Zone'.
Assign valve, since John right now has a total of 4 valves, he has to select any 2 valve numbers (as discussed above) from the list of valves available.
Assign sensors, John can select any registered sensor or can create any new sensor and then assign it to the zone.
After filling up the form, John has to click on the save button on the top right corner.
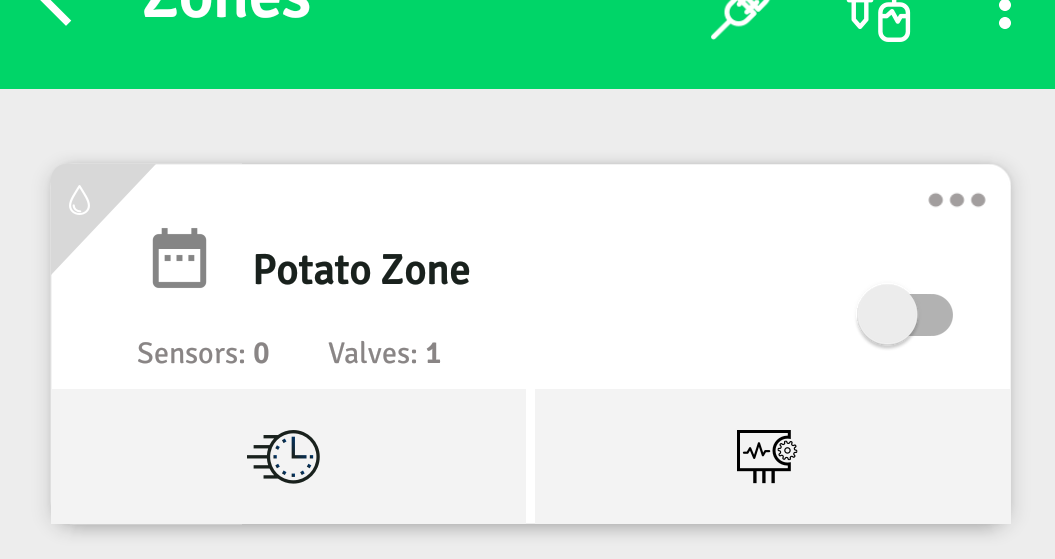
After the successful creation of the zone, John will have the provision of either to create a feedback event, a schedule or to go back to the previous screen, and he now will be able to view the created zone as a card on the screen, from where John can edit or delete this zone.
Caption
Note
Following are the points to be concerned with a zone:
A user can assign multiple valves and sensors within one zone.
A valve assigned to one zone cannot be used in any other zone.
A sensor assigned to one zone can be assigned to another zone.
A zone used in any schedule or feedback event can neither be edited nor deleted.
Create a Schedule:
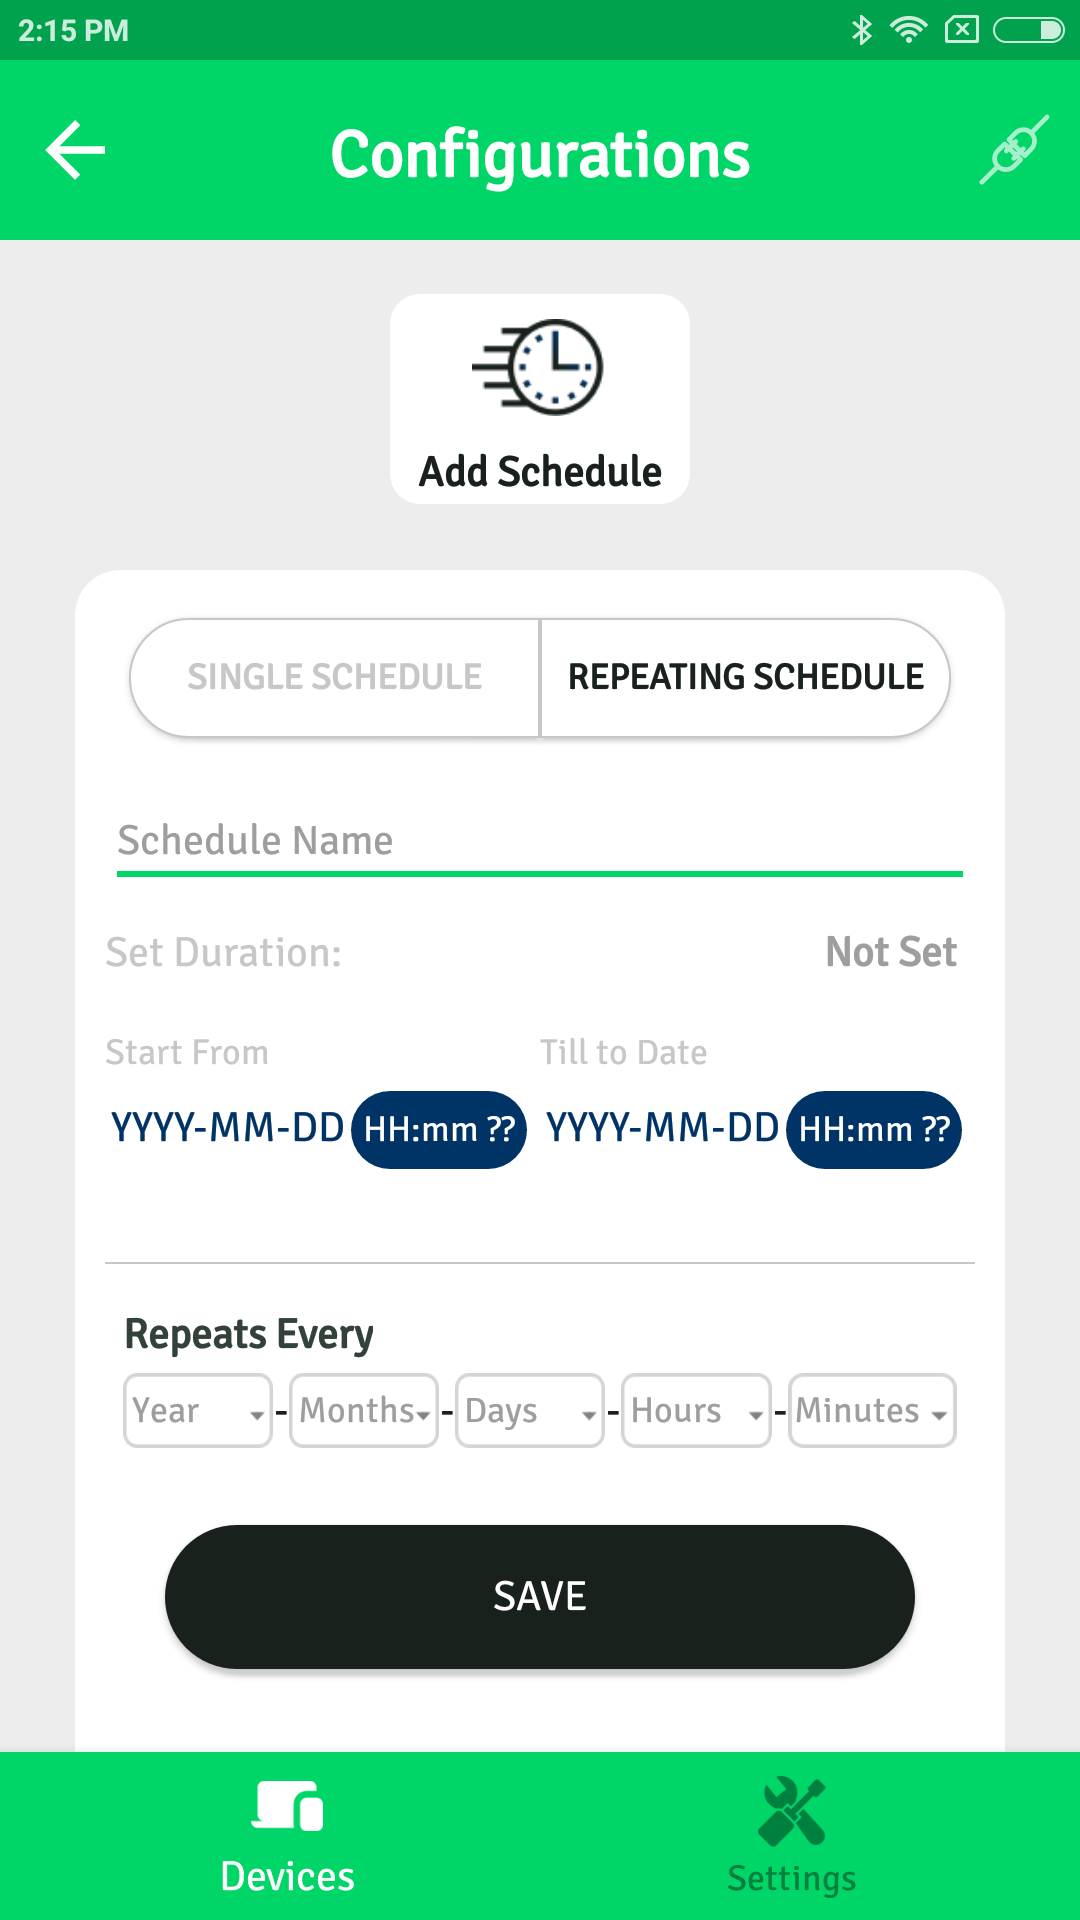
After the successful creation of zones, John now can create a 'Schedule', either from the zone creation screen only else, John has to navigate to the Schedules List screen, from the zone card’s schedule icon(bottom-left of the card) and click on the 'Plus' button at the bottom-right portion of the screen. SmartGro app will redirect him to Add Schedule screen. Say John now has to create schedule for potato zone, then he will click on the schedules icon on Potato Zone’s card.
Caption
John has to provide the following values:
Schedule Type, Add schedule screen have two buttons on the screen, SIngle and Repeating Schedule, which defines whether the schedule must run once or repeat finitely. In the current use-case scenario, John must select ‘Recurring’.
Schedule Name, for future references e.g. ‘Morning Watering Schedule’.
Duration time, this field defines the minutes of execution needed, i.e., for how much time the valve must be kept on. As per the use case, John must provide a value of 30 mins.
Repeats every, this field is applicable only if the Schedule Type select is 'Recurring' and defines that the once a zone is turned on, must be turned on again after what interval of time. As the use case defines, Potato zone must be watered every morning at 8 AM, so in this case, John must provide a duration of 24 hours, i.e., after every 24 hours, valves must be turned on at 8 AM. User gets a scrollable duration picker, in which he can select the durations varying from a minute to a maximum of 2 years.
Starts At, John has to select the date and time from date-time picker at which the schedule must initiate working.
Ends At, applicable only if the Schedule Type is of recurring type. This field specifies the expiry date of the Schedule. Say the potato plants need watering for 6 months, then the ends at must be six months later than the date and time selected as Start At.
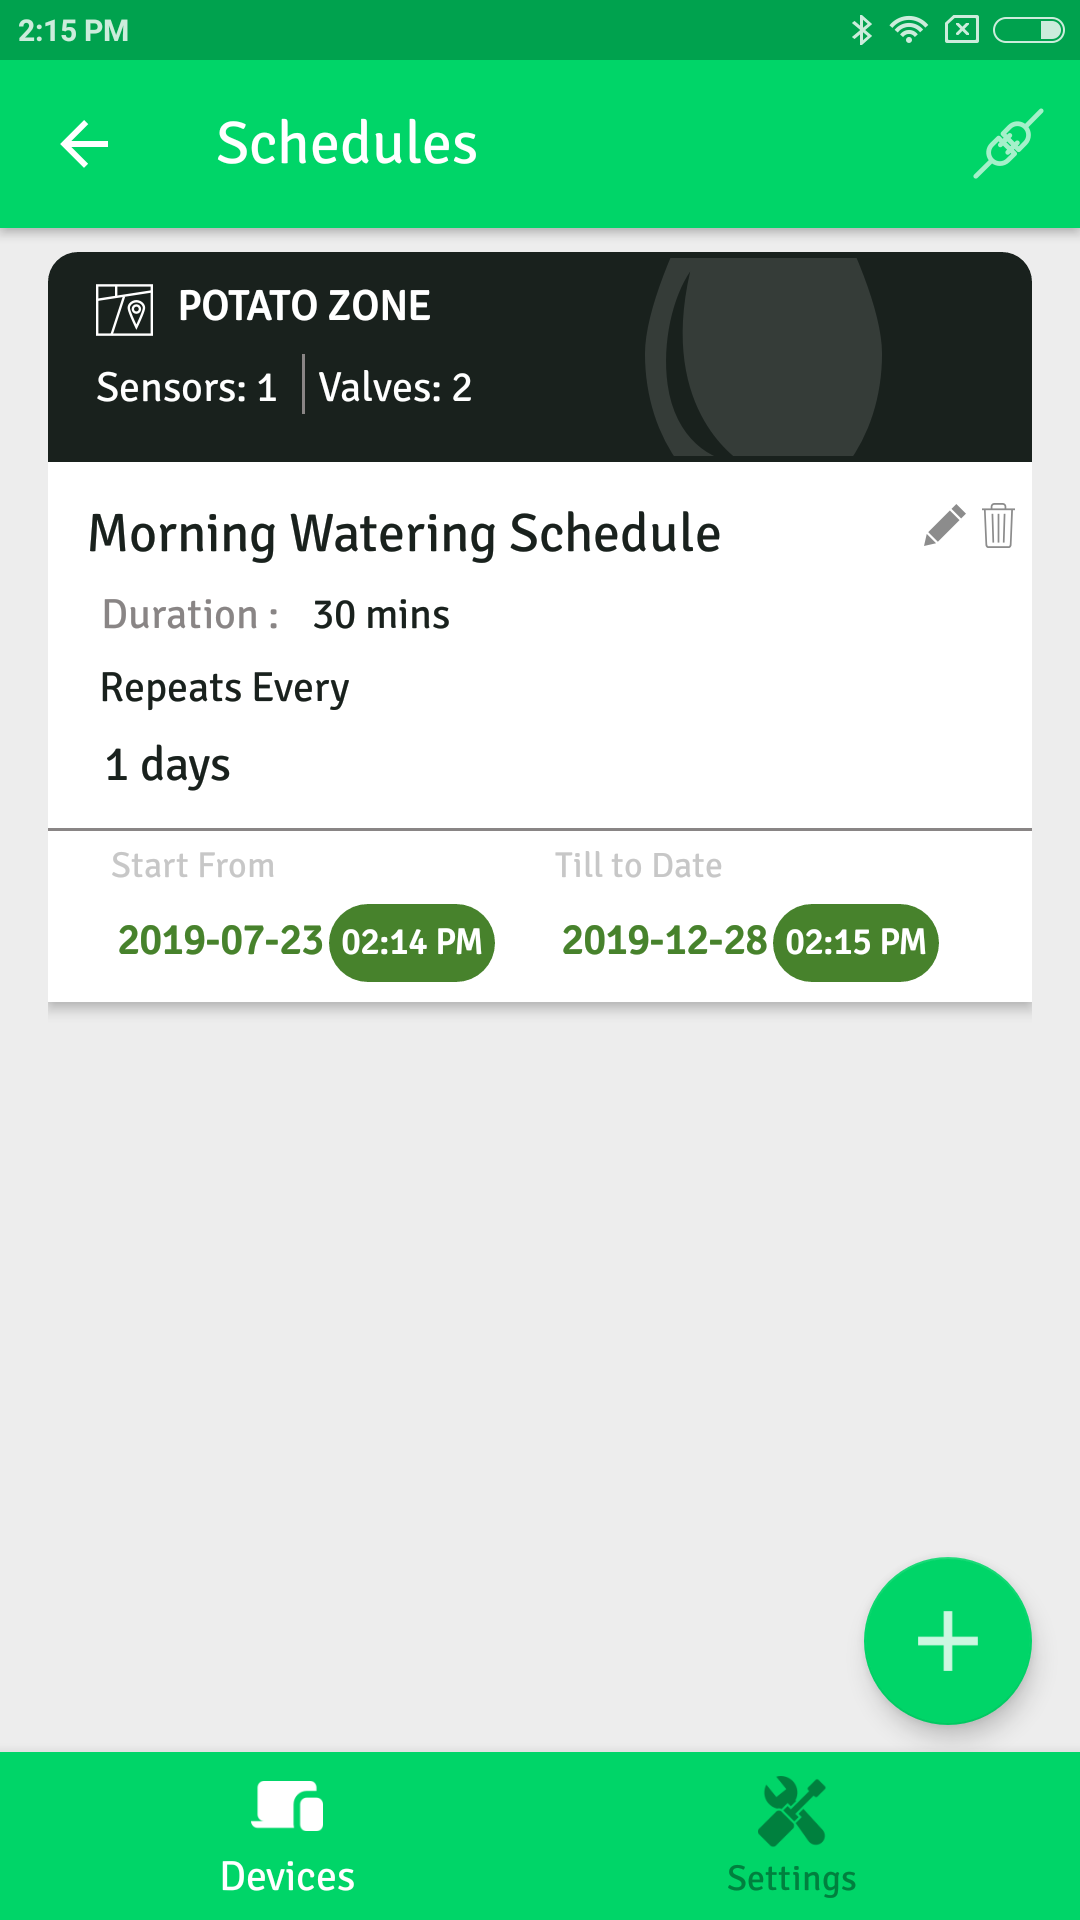
After the successful completion of Schedule creation, the app will redirect to the previous screen.
Caption
Note
Since the bluetooth connection is mandatory for any kind of communication and if by any reason, the connection is not available, then the user will get a prompt and can save the Schedule in a queue and the android app will later transmit the request to the respective hardware unit when a connection is available.
The operating time must be greater than the schedule defined in the case of the 'Recurring' schedule.
Create an event:
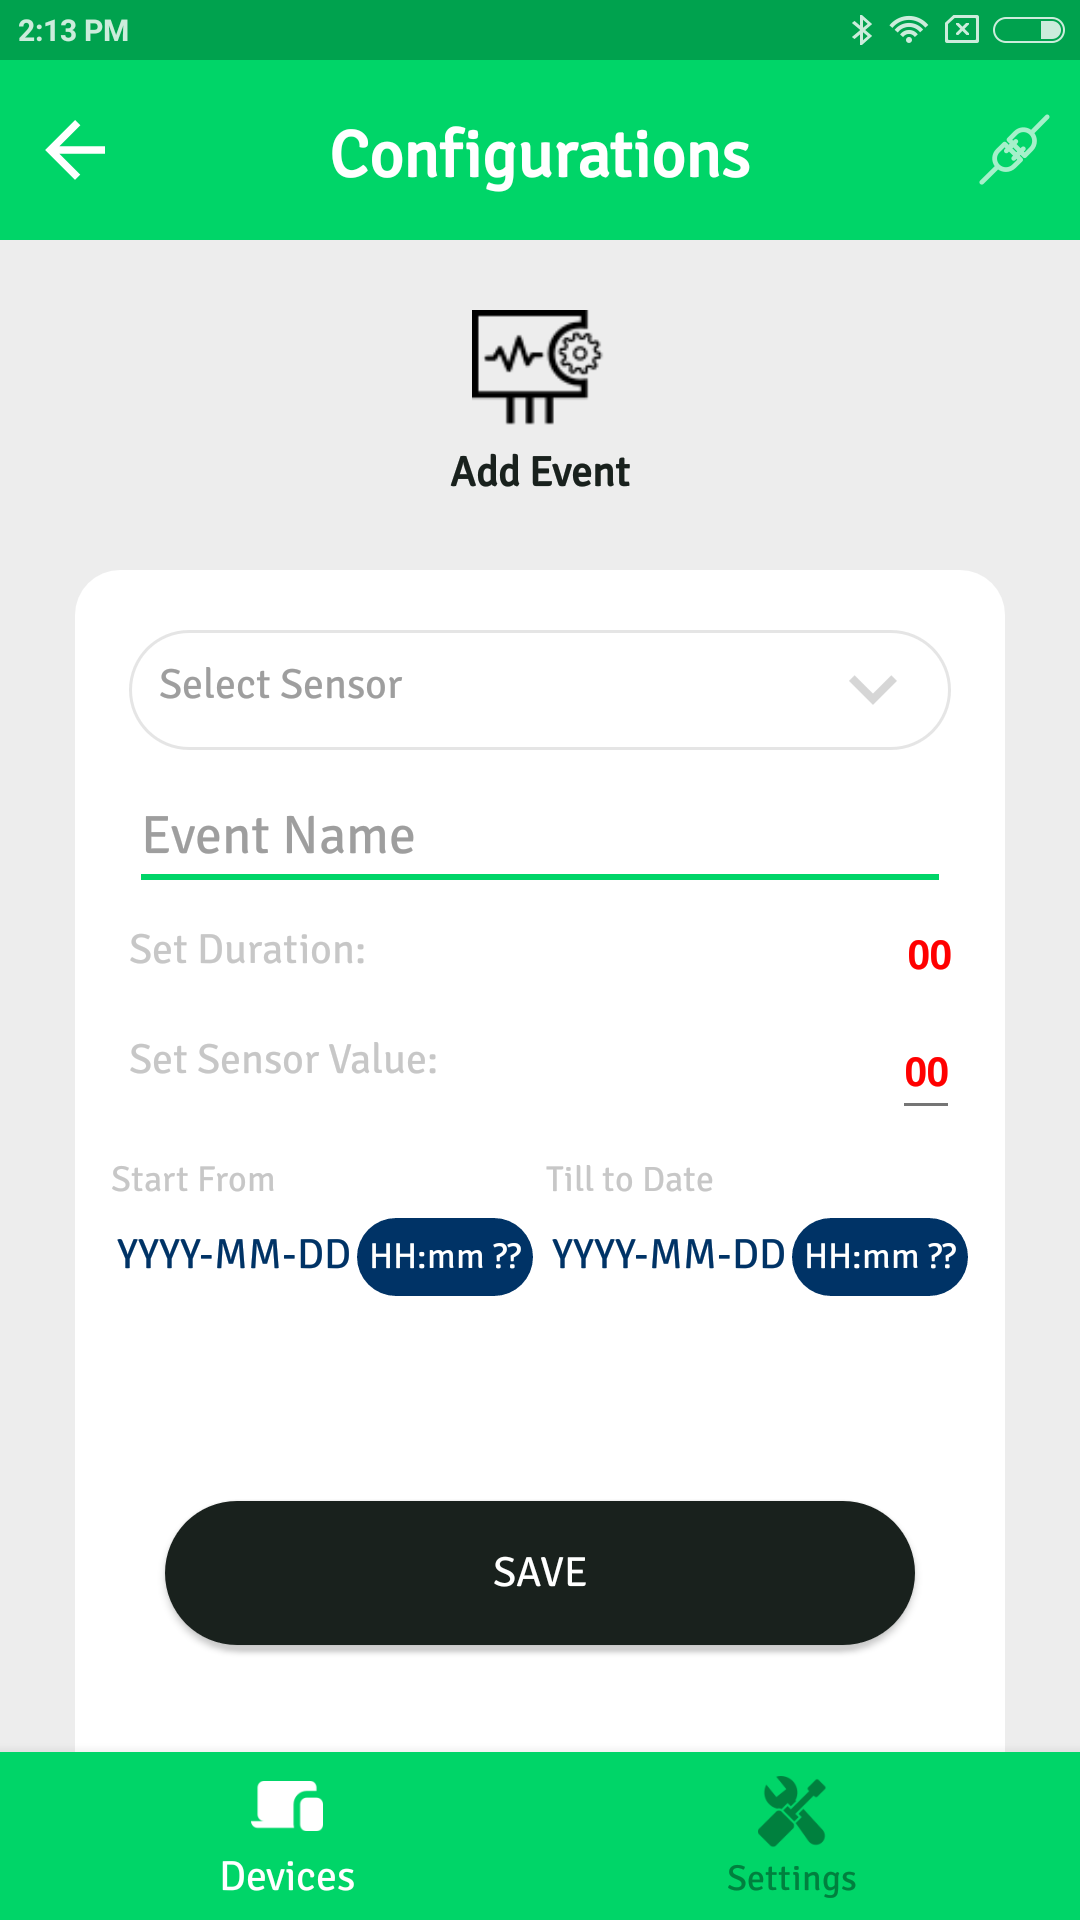
John now can create a feedback event which will trigger when a specific-condition defined by him is satisfied. As per the use case, if the soil gets dry below the acceptable value of 20% wetness, the valves in the potato zone must be turned on or 15 minutes. John can create a Feedback event either from the zone creation screen only else, John has to navigate to the Events List screen, from the zone card’s schedule icon(bottom-right of the card) and click on the 'Plus' button at the bottom-right portion of the screen. SmartGro app will redirect him to Add Event screen. John has to provide the following values:
John has to provide the following values:
Sensors, John must select the desired sensor, based on its value, the event is created.
Event Name, for future references.
Duration Time, the duration for which the valves must be turned on upon the event trigger.
Sensor Value, the limit value of the sensor which will trigger the Event.
Starts At, John has to select the date and time from date-time picker at which the event must initiate working.
Ends At, this field specifies the expiry date of the event. After providing all these details, John must click on the 'Save' button present on the top right corner of the screen.
CaptionCaption
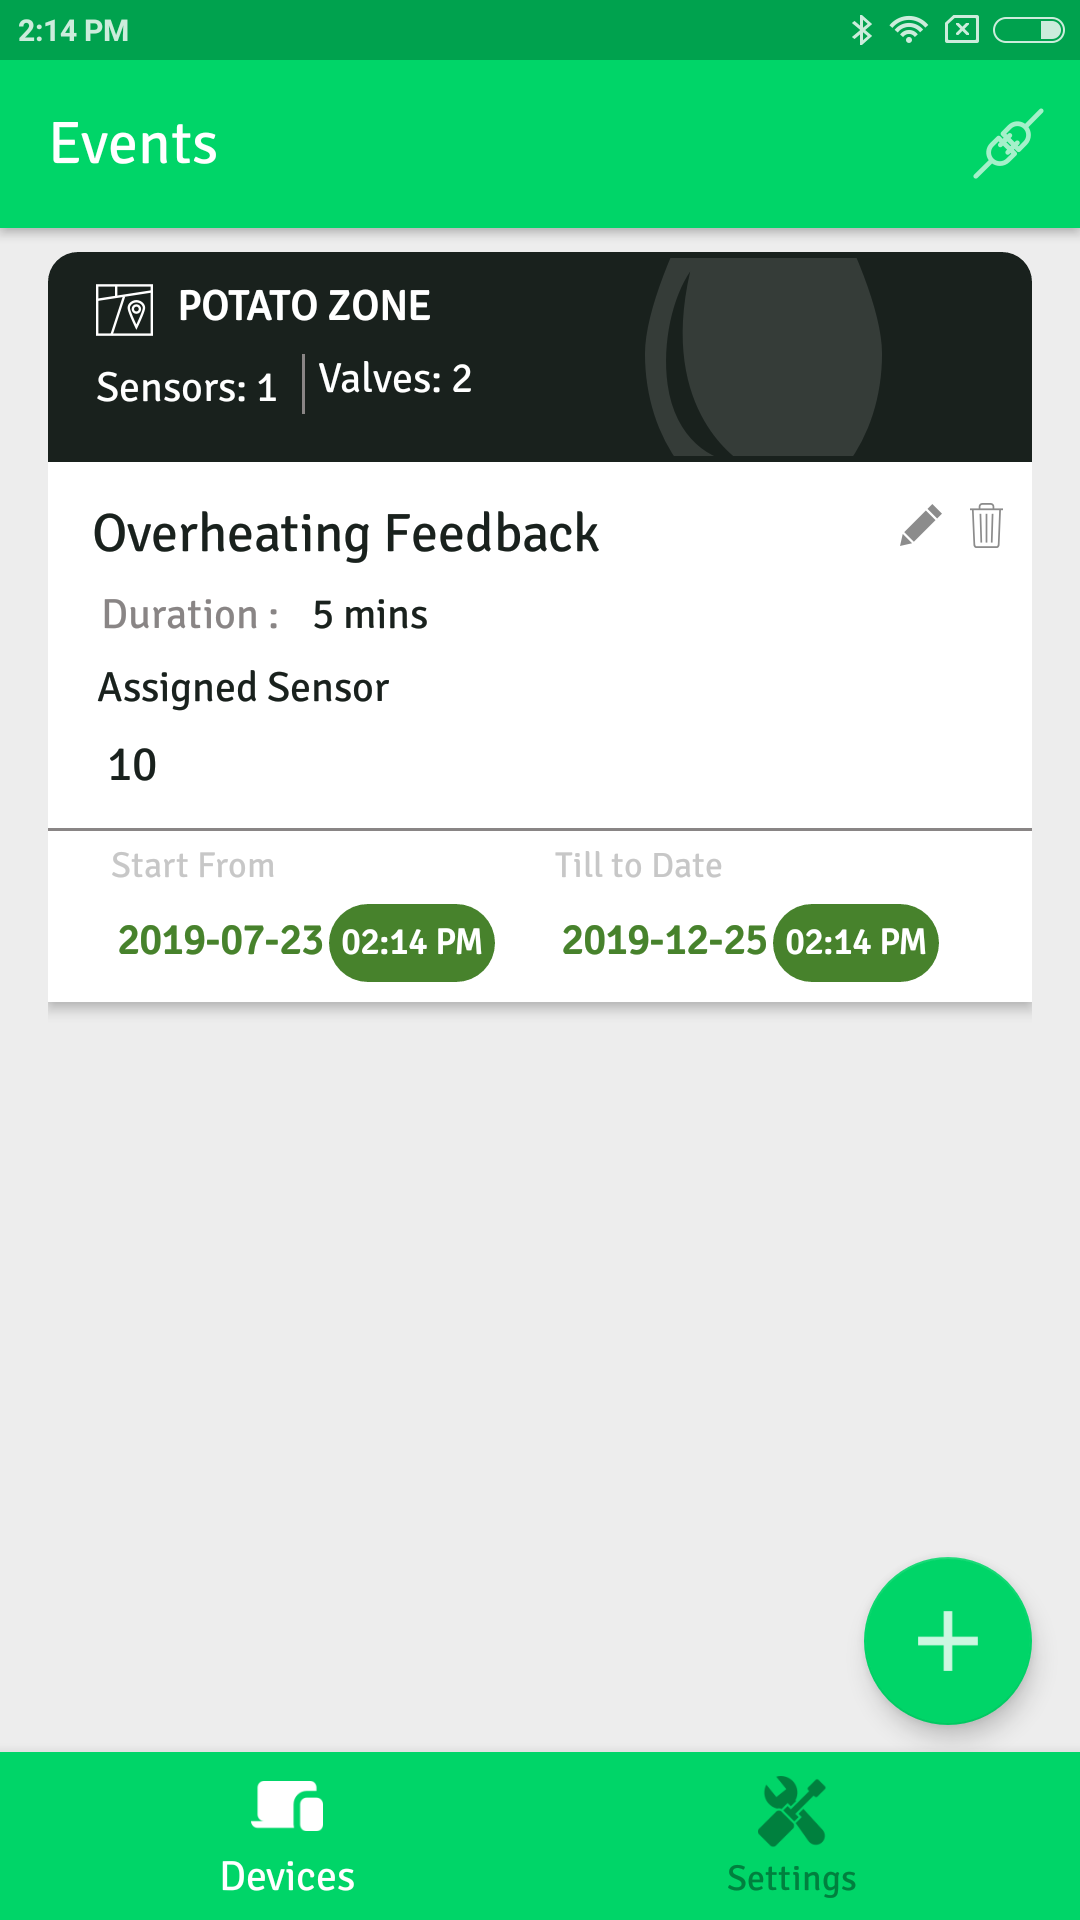
After the successful creation of an event, the app will redirect to the previous screen, from where John can edit or delete the event.
Note
The value specified for the sensor must be +5 to the desired value of the sensor.
Since the bluetooth connection is mandatory for any kind of communication and if by any reason, the connection is not available, then the user will get a prompt and can save the Event in a queue and the android app will later transmit the request to the respective hardware unit when a connection is available.
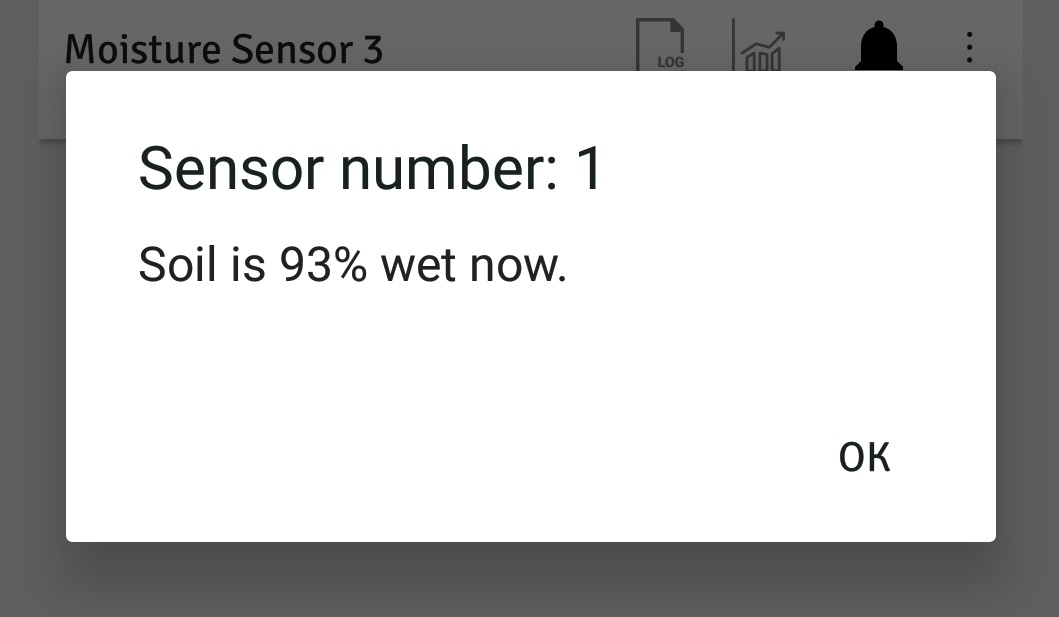
Check current sensor value:
John can check the current value of the sensor from Sensors. He has to navigate to the sensors tab and click on the bell icon for the desired sensor.
Caption
Upon which a request is sent to the hardware unit and fetches the current value of the sensor and is shown in a dialog box.
Turn the valves on manually:
John can turn on the valves manually, if needed. Within the Zones tab, every zone card has a switch that avails the manual control over the valves. If turned on, all the valves assigned to the respective zone will turn on. John can do so only if there is an active bluetooth connection.
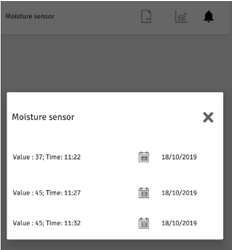
Syncing Sensor Logs:
In order to monitor the condition of soil, John can watch the variation in the moisture content of the soil. He has to click on the options menu on the top-right corner of the screen, and select the ‘Sync Sensor Logs’ option. John can check those synced log from Sensor tab and selecting the sensor he prefers to monitor.
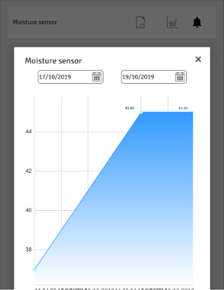
Plot graph for Sensor Log:
SmartGro app provides a graphical representation of the synced sensor logs. John can monitor the variations in the sensor values.
CaptionCaption
Sync Valve Log:
Each schedule and event turns valve on and/or off. John can monitor each activity by syncing valve logs. He has to click on the options menu on the top-right corner of the screen, and select the ‘Sync Logs’ option. John can check those synced logs from the ‘Logs’ option in the option menus of the zone’s card.
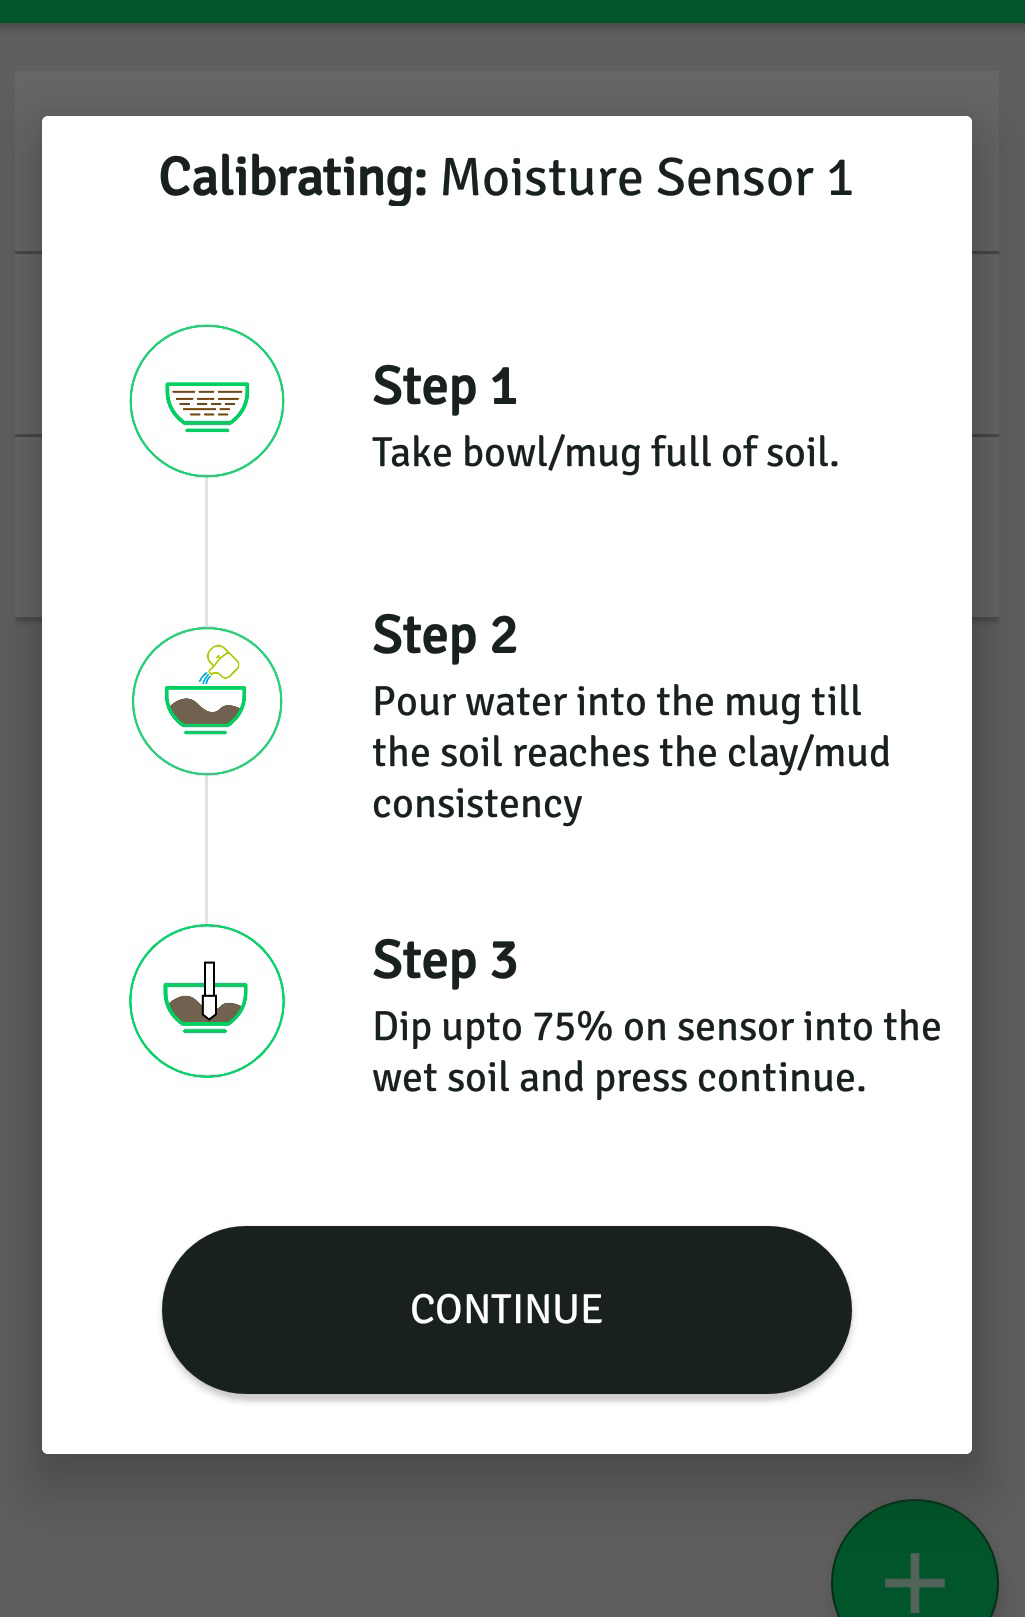
Calibrate Sensor:
Sometimes soil may have different water holding capacity and hence the moisture sensor may not show an accurate value, resulting in a faulty execution of feedback events. To avoid such cases, users have to calibrate each sensor(if needed). Users can view the sensors in the Sensorlist screen via the sensors icon on the Devices list screen, and every sensor listed has an option to be calibrated, by selecting which respective sensor can be calibrated. Steps to follow are:
Take a mug/bowl.
Fill up the mug with soil upto ¾.
Pour water into the mug till the soil reaches the mud/clay consistency.
Dip the 3/4th of the respective sensor into the mud/clay, and click on continue.
Caption
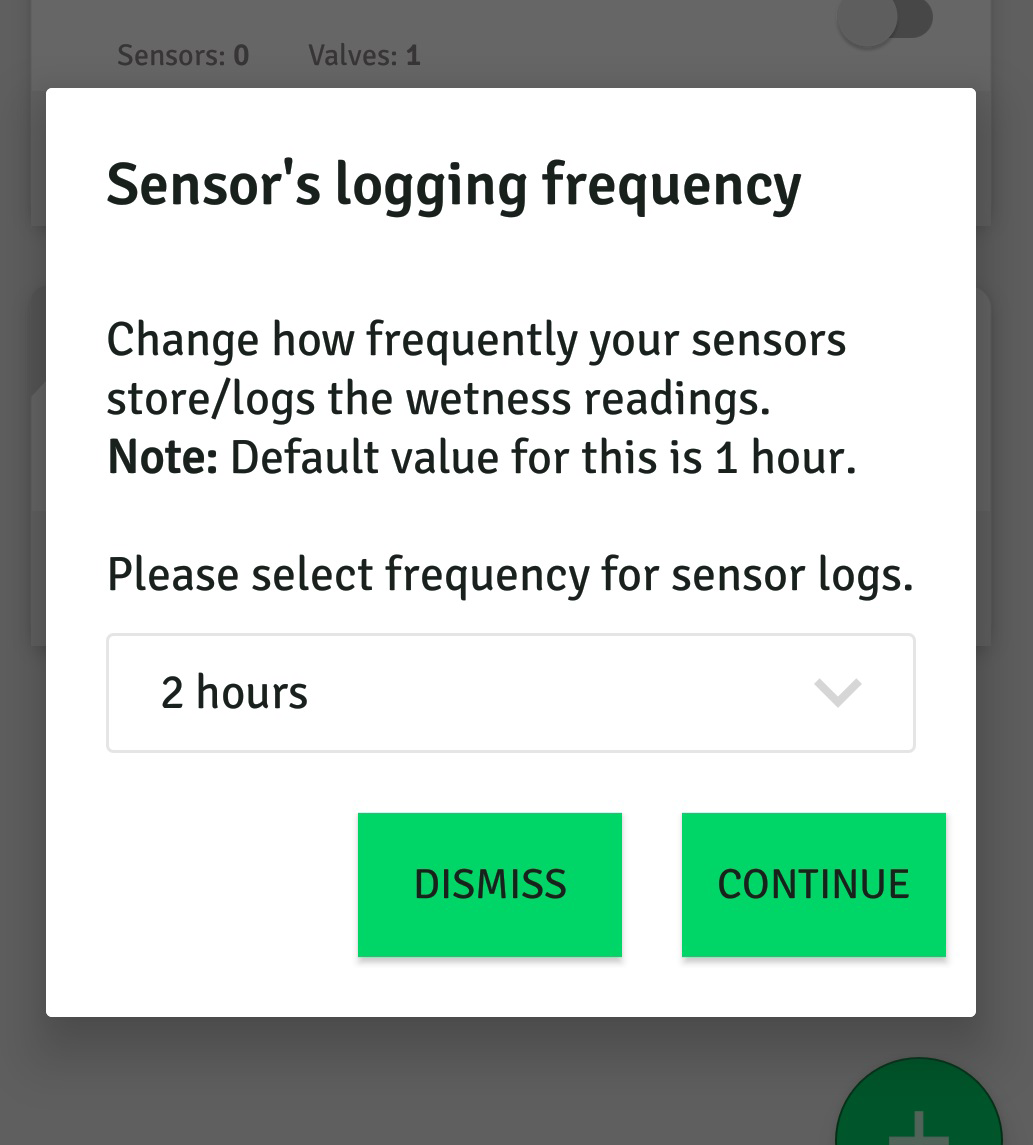
Log Frequency:
Users can update the frequency of the sensor logs to be saved, i.e. the interval of sensing wetness from soil. “Set Log Frequency” service is available in the top right screen on the “Zones” screen, users can choose a time interval between 1 to 5 hours per day.
Caption
Fetch Current time:
In order to know the current time in the smartgro hardware unit, users can fetch it from the hardware device, option to which is available in the top right screen on the “Zones” screen.
Sync Time:
In order to sync time over SmartGro hardware unit with the user’s mobile, he/her can use the option ‘Sync Time’ from the options menu in the top-right corner of the screen.
Reset Device:
User also has an option to reset the device, which will wipe all the data from the SmartGro hardware unit and the user’s mobile device as well. This option leaves the registered device uneffected, but with no zone, sensors, schedules or events in both app and hardware device.
Delete Device:
Users can also delete the device, which will wipe all the data from the SmartGro hardware unit and the user’s mobile device as well. This option completely removes the registered device and any data associated with it.
Note
An active Bluetooth connection is mandatory for Reset and Delete service to be used.
All the schedule and events under execution will stop the execution and will be wiped off from the hardware unit.
SmartGro Mobile App
SmartGro BT
SmartGro is a smart App for Smart Irrigation in landscaping and precision farming. SmartGro makes the irrigation smarter and easy for you. With the schedules and events, you never need to worry about the irrigation in your farms or watering your plants, with the use of Drip Irrigation methodology. Know your soil better with the sensors, and the data presented in a beautiful graph.
Download
Note
In order to use this app, you need to have our smart hardware unit. Shop Now
Videos
SmartGro Version1.1 Drip Demo
SmartGro For Rooftop Vegetable Cultivation
Warranty
SmartGro warrants MATERIALS installed for a period of SIX MONTHS from the date of installation. LABOR to repair or replace the components of a drip system is covered for a period of SIX months from installation. This warranty includes all system components installed by SmartGro, including the control unit, sensor module (sensors are not included in warranty), valves, valve driver, power adapter. The warranty includes only defects in materials or workmanship and expressly excludes improper usage of the system, damage caused by freezing, fire, flooding, or any other natural phenomena, or damage by any other cause. Any modification or repair of the system by any company other than SmartGro voids this warranty. This warranty expressly excludes (1) clogging of system components due to debris in the water supply. However the Drip Kit provided is not covered under the warranty period.
FAQs
What will be the power consumption?
5W for controller, 8W for the solenoidal valve during operation time.
What all devices does SmartGro support?
We support Android phones running Android 7 or 7+ and BLE compatible. Versions running lower than 7 does not work with SmartGro.
Supported operating systems?
Currently the app is available on Android version, iOS version will be available shortly via App Store.
Will the SmartGro device work if there is any power loss or in situation of no power?
The device needs to be powered continously, If there is a power failure, when the device is rebooted it will check for any missed schedules and do watering accordingly.
In case of hardwater (treated water) there are chances of debris, in that case what is the solution?
We strongly recommend you to install a water filter to avoid clogging issues. In case of non treated water also we recommend the same.
What is the warranty period? What all parts are covered under warranty period?
SmartGro warrants MATERIALS installed for a period of SIX MONTHS from the date of installation. More details under Warranty Section.
Is there warranty for Drip Kit?
No there is no warranty
Will you provide after service for drip kit?
No, but can go with AMC kind of approach upon mutual agreement with customer.
What does the LED indication on the control unit mean?
Blue: Indicates no schedule or event is active, there is no schedule or event present. Green: Indicates active schedule or event in the background. Green Blinking: Indicates schedule and event is currently running. Red: Indicates in case of sensor not responding. (Please note that this will not affect the active schedules and events)
What if the hardware device is not getting detected via Bluetooth?
In such cases we recommed you to manually enable the bluetooth.
Are there any specific device which have issues detecting BLE and connecting to it?
Similar issues were reported in the devices like Honor 9 and Honor 7A from our testing center.
Contact
📧Please contact us on sales@troncart.com, 9995781010 or 0471 2710004, to get a demo.